Introduction to MSP430 Interrupts

In this tutorial, we will see a practical way of coding interrupts. Our task for today will be to learn interrupts for GPIO and Timers. In the initial part, we will first look at coding interrupts for the GPIO pins, and in the other half, we will modify this code to add interrupts for timers. By the end of the tutorial, you will have a code that will blink a led using a timer interrupt. However, the blinking frequency will vary if you push a button. In the last tutorial on timers, we saw that we were continuously monitoring the timer flag to check when the timer has overflown. This process is called polling. The only problem with this method is it keeps the processor busy. What if we had another way by which the timer would itself tell the CPU that the timer had overflown? This is where interrupts come into the picture. For example, imagine a scenario where you would always go up to the door to see someone s there or not. This process can be called…

Continue reading

Timers of MSP430

In the last tutorial, we had a look at configuring clocks or internal clocks of the MSP430. Since you are now at a stage where you can set clocks on your own, we can use them to access various functions of the MSP430. All of the major features, such as the ADC, timers, e.t.c, rely upon the clock or the clock speed at which the microcontroller functions. Timers of any microcontroller are special registers that increment or decrement their value automatically. They are an integral part of the microcontroller and are used in almost every project, from basic to complicated ones. A useful feature of the timers of the MSP430 you can use them to achieve a real-time clock, i.e., a delay of precisely 1 sec, provided you use the 32.768kHz crystal supplied to you with the Launchpad. Let’s move onto the technical specification of the timer. If you have referred to the user guide of the msp430 you must have founded out there are two types of timer mainly ‘TIMERA’ and ‘TIMERB.’ An important point to note here is…

Continue reading

Configuring the DCO of MSP430

Clocks are an essential part of any microcontroller. These are the first thing one should know while beginning to use any feature of the controller, whether it’s a timer, interrupts, or ADC. All of them rely on the clock setting of the microcontroller and works accordingly. The MSP430 is not so different. However, it features very easy-to-configure clock settings, which might look a bit tough initially, but once you get used to it, you will find it amazing to use. Unlike AVR, where you use super complicated fuse bits to change your clock source and the frequency, this is not the case with the MSP430. The clocks are easily configurable, and most important, if you are using internal clock, you can change its frequency at any time during the program, which is not possible in the AVR series. Before beginning, let me describe our task. We will use a blink-led program, which is already included with CCS and without changing the delay loop, and with the help of the internal oscillator, we will observe a change in blinking time of…

Continue reading

Connecting buttons to MSP430

In this new tutorial, we will see the easiest way to connect a push-button to the MSP430. I will be using msp430 Launchpad for the purpose of the tutorial, however, you can use a bread-board to externally interface the push-button Before I begin, I want to tell you the advantage of Msp430 over other sets of microcontrollers available in the market.  As you might have seen, msp430 is a pretty cheap microcontroller from the Texas family, and has a 16-bit wide data bus for processing the data but has very few number of pins. Only 2 ports of 8 pins each are available for interfacing and that two without support for an external crystal. If you want to connect an external crystal, you lose two more pins and that reduces the total number of pins available for interfacing to just 14.  But this is just the other side of the coin, the other being its application in low-power projects. Consider a situation where you need to log a data out of a sensor and send it to a local station…

Continue reading

Blinking the LED with MSP430

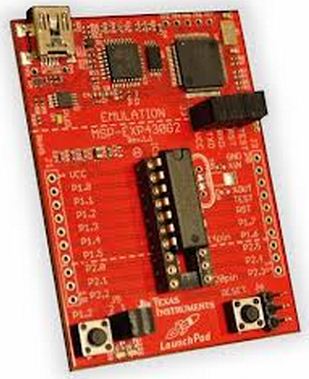
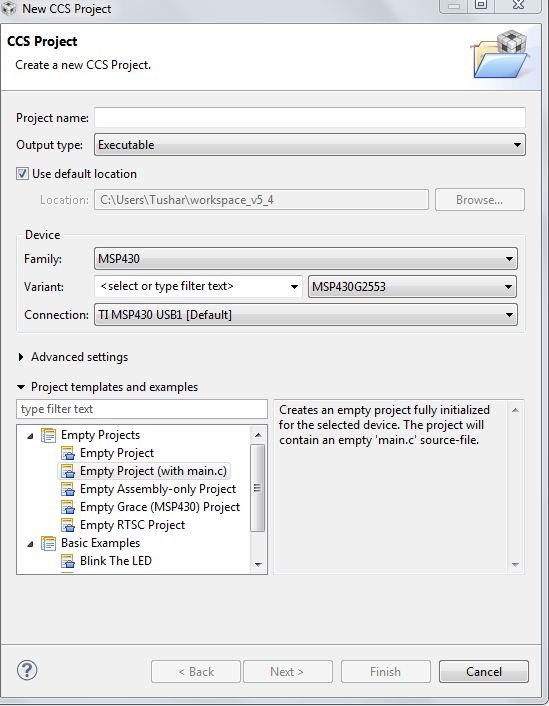
This is the second tutorial on MSP430, and it will feature code on blinking the led’s and hence will tell you how to configure the ports as input and output and make the port low and high when it’s declared as output. For those having an MSP430 launchpad, it has two onboard led’s connected via two jumpers to pins p1.0 and p1.6. Our task for today is to blink these led’s alternatively or toggle them. To start with an open code composer studio, go to FILE->NEW->CCS PROJECT. After doing this, you will get a window mentioned below Enter your project name, select family as MSP430, and now the variant is msp430g2253. Remember, this is a critical step. To check your option, refer to your chip on the Launchpad. It has a mention of the variant. For all the tutorials, I will be using msp430g2553 as the chip, so kindly change accordingly. In the bottom box, select Empty project (with main.c)  and click Finish.

Continue reading

Getting Started With The Msp430

This tutorial is an introductory tutorial on getting started with the MSP430 series of controllers by Texas Instruments. There are millions and trillions of ways to start using microcontrollers. Hobbyist or people who find hard to code typically prefers Arduino as their coding environment, while engineers might prefer using AVR/PIC. The MSP430 microcontroller is a highly versatile platform that supports many applications. With its ability to consume ultra-low power, it enables the designing engineer to meet the goals of many projects. It has, of course, its limitations. It is inclined mostly towards low energy and less intensive applications that operate with batteries, so processing capabilities and memory, among other things, are limited. However, it’s still called a mixed-signal processor and is capable of doing some sort of speech processing. Before starting with some exposure to hardware and software part, I assume that you all have some sort of programming knowledge in embedded c. Even if you know java or c++, you will still be able to adapt to the tutorials easily as the logic will remain the same; only the…

Continue reading