This tutorial is an introductory tutorial on getting started with the MSP430 series of controllers by Texas Instruments. There are millions and trillions of ways to start using microcontrollers. Hobbyist or people who find hard to code typically prefers Arduino as their coding environment, while engineers might prefer using AVR/PIC. The MSP430 microcontroller is a highly versatile platform that supports many applications. With its ability to consume ultra-low power, it enables the designing engineer to meet the goals of many projects. It has, of course, its limitations. It is inclined mostly towards low energy and less intensive applications that operate with batteries, so processing capabilities and memory, among other things, are limited. However, it’s still called a mixed-signal processor and is capable of doing some sort of speech processing. Before starting with some exposure to hardware and software part, I assume that you all have some sort of programming knowledge in embedded c. Even if you know java or c++, you will still be able to adapt to the tutorials easily as the logic will remain the same; only the code language changes.
The other difference which gives MSP430 an edge over other PIC/AVR that it’s is a 16-bit controller as compared to AVR/PIC, which is an 8-Bit controller. By 16-bit controller, we mean that it has a 16-bit data bus.
Now, let’s have a look at the software available to program the MSP430. For programming the MSP430, there are three major software available
- IAR – A very commonly used compiler with a free version but rather expensive
- Code Composer Essentials (CCE) – Developed by TI and also available with a free version but restricted memory
- MSPGCC – Free Compiler with good capabilities based on GCC
Although IAR and CCE are not free they do have a code-limited version that is fully supported to program MSP430 without any restrictions. Regarding MSP430, although it’s free open-source it might give some hardware hiccups every now and then.
For the purpose of the tutorial, I will be using Code Composer Studio, which can easily be downloaded from https://processors.wiki.ti.com/index.php/Download_CCS> for free of cost. However, you have to request a download request to them, and it might take 2-3 days for the downlink to be made available, but it’s worth waiting, considering the fact that it’s provided free of cost.
For your information, the accessible version of IAR limits the code to 4KB of flash memory and CCS to 16kb of memory, but the majority of the MSP430 variants have lesser memory than 16kb, so using CCE, you will not face a problem related to memory.
Both the CCE and IAR comes with built-in integrated debugging environment, however, the msp430gcc users will have to use msp430dbg for debugging purpose. It’s really important to have some sort of debugging support from the software as it gives the user a chance to verify the system whether it’s working in the way it should.
Since we have already talked about compilers, let’s talk about the programmers. The MSP430 series of microcontroller features a programmer who is named as Flash emulation tool, which mainly provides the ability to burn the code into the chip and also serve as a debugging tool. You can program the MSP430 both via JTAG or a 2-wire connection but hang on for a moment; you don’t need a separate tool or device to program the MSP430. The hardware we will be using provides an onboard programming capability that too via USB.
Next is the most crucial part, the hardware. For those who are eager to know the cost of the hardware, which as an on-board programmer, it’s just 10$. Hard to believe, but it’s true. Initially, it was launched at a whooping price of just 4.5$, and that’s really cheap as compared to AVR/PIC on a functionality basis. The hardware is known as MSP430 launchpad and can easily be found out on our store.

Another advantage of using the Launchpad is, that the chip is removable and replaceable. So even if you burn out your chip due to faulty connections, no need to worry just get a new chip and replace it and you are ready to go. If you have a little extra money, you might buy some fancy boards that have an on-board peripheral such as LCD, matrix etc.
For the purpose of the tutorial, I will be using MSP430 launchpad. Now before you buy, the Launchpad is available in different versions, and they vary only in the chip of MSp430. I suggest you to go with v1.5, but even if you have 1.4, it’s not at all a problem. You can replace the DIP msp430 chip with those in v1.5 and use it in v1.4.
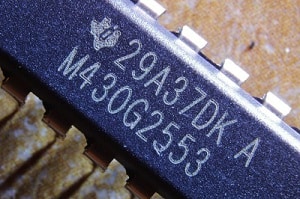
The chip I will be using is MSP430g2553 which has the capability to go up to 25MHZ, 16kb of flash memory, and up to 512b of RAM and 24 GPIO pins. An exciting thing that it also features an integrated analog temperature sensor.
Let’s move to a simple ready to burn program that we will use to check our working of Launchpad after configuring the software needs.
I assume that you have downloaded and installed the software without any errors. Start the code composer studio from the start menu or desktop, and make sure you connect your Launchpad to the PC via the cable provided. In case you get a driver error while connecting the Launchpad, you may comment below so that I can assist you.
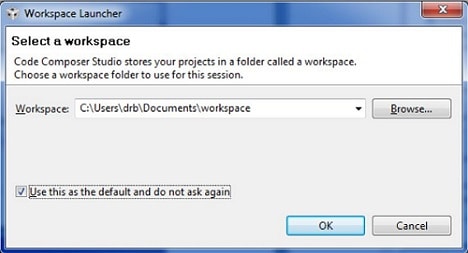
On first start of the software, you will get an option to where to decide your workspace folder. Choose where it’s feasible for you. I am going with my documents.
On the next screen, select the code-limited version if you are prompted with the license. The next step is to create a new project, so go to FILE->NEW->CCS project. You will see following on screen

In this type, any project name you wish to, and in the variant name, write MSP430G2553 OR YOU CAN SIMPLY SELECT FROM THE DROPDOWN MENU AS YOU WISH. Kindly note it’s essential to select this controller, as we will be using this. However, if you are using another variant of msp430 chip, you will have to change to that variant. In the project templates and examples at the bottom, select Blink the LED, as we will be using that, and click finish. Once you click finish, a new window will open with the code already written into it. Don’t try to think much about the code, as we will see it in the later stages.
One thing I forgot to mention is that the Launchpad features onboard two LEDs and two push-buttons, one for reset and other as a peripheral. For now, go to PROJECT->build. Your code will get compiled now without an error and will be ready to be burned. Now move on RUN->Debug. At this stage, you might get a ULP advisor error; simply click proceed. After clicking debug and proceeding, you will get a screen like given below

button, and your code will start executing. You might want to push the reset button the device.

Congrats, you have successfully burned your first program into the device naturally.