ST32MVLDiscovery project template for GCC

In this tutorial, we will set up a simple template for programming ST32 -Discovery board. For this, we will use the latest Code Sourcery and Eclipse IDE. To make things simpler, we will use ARM-based 32-bit MCU STM32F10x Standard Peripheral Library v3.5.0, that can be downloaded from ST site. Also, we will use STM32VLDiscovery firmware package for example, files. And why write our linker, startup, and make scripts. For this, we will use Michael Fischer’s example project (STM32Test.zip) for yagarto. We only need slight modifications to fit our needs. In this stage, we assume that you have set up Eclipse and Code Sourcery, and we can go further. First of all, create new C project in Eclipse File->New: Enter the project name, select the path where the project will be stored, and select Makefile project->Empty project in the Project type list. In Toolchain, list select Other Toolchain. This will create an empty project that will run make to compile the project.

Continue reading

ADC on Atmega328. Part 2

After we’ve learned how to perform simple ADC conversions on AVR microcontroller we can move forward with more complex tasks. AVR ADC module has many valuable features that make conversions more robust without occupying MCU resources. Imagine that we need to sample analog waveform or audio signal. It has to be done precisely at defined sampling frequency like 20kHz. The only way to do this correct is to use auto-triggering with exact time intervals. Why not pass counting task to a timer? Let’s write Timer0 auto-triggered ADC conversions with ADC complete interrupt service routine.

Continue reading

ADC on Atmega328. Part 1

Microcontrollers are meant to deal with digital information. They only understand ‘0’ and ‘1’ values. So what if we need to get some non-digital data into the microcontroller. The only way is to digitize or, to speak convert analog into digital. This is why almost all microcontrollers are featured with the ADC module. Among other electronic parts, the Atmega328 microcontroller also has 8 (or 6 in the PDIP package) ADC input channels. All these can be used to read an analog value that is within the reference voltage range. Let us see how this is easy.

Continue reading

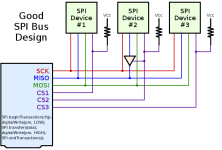
Connecting multiple I2C devices on a common bus

The I2C communication protocol is so popular today that you can buy varieties of I2C-compatible devices in the form of temperature sensors, serial EEPROMs, real-time clocks, LCD drivers, port expanders, and so on. While most modern microcontrollers do have built-in I2C communication ports, its implementation requires a good understanding of the protocol in general, its signal types, and an addressing scheme for uniquely identifying multiple devices on a common I2C bus. Embedded Lab’s new tutorial on I2C communication covers all the detail that is required for connecting multiple devices on a common I2C bus. The tutorial uses the PIC18F2550 microcontroller, to which is connected three I2C compatible devices: 2 EEPROMs (24LC512) and one temperature sensor (DS1631). In the experiment, the microcontroller receives the temperature readings from DS1631 sensor and stores them in the two EEPROMs. Later, the readings are retrieved from the EEPROMs and displayed on an LCD screen. More about I2C capabilities The number of I2C devices that can be connected to a microcontroller depends on the number of available I2C bus lines, the addressing scheme used by the…

Continue reading

Programming STM32-Discovery using GNU tools. Startup code

Startup code is executed just after microcontroller is reset before the main program. As linker script, startup code usually is implemented as universal code for all the same microcontroller type. So often you don’t need to write one from scratch. Anyway, it is good to know what happens there anyway. As we said, linker script has to go along with the startup code. This means that it will initialize MCU automatically according to data defined in the linker. Startup code initializes variables, copies defined variables from Flash to RAM, initializes stack and then gives resources to the main program. You will find that startup codes usually are written in assembly language, but this can also be done in C, which is easier to read and modify if necessary. First of all, in linker script we have pointed entry point to startup with the following command: So in startup code, this will be the first function called.

Continue reading

Programming STM32-Discovery using GNU tools. Linker script

Previously we went through setting up a development environment for ARM Cortex-M3 microcontroller. We decided that two equal choices will do the same job – either CodeSourcery G++ Lite or Yagarto. Both use the same base of GNU tool-set. Developing with GCC tools To get a working binary, there is a series of tools involved during code development. Several tools are necessary to compile simple applications. These are compiler, assembler, linker and binary generator. Each of them does its task in a chain process. When you start compiling your project, a linker is usually invoked, which with correct parameters links libraries and object files. Once executable is generated, the binary image generator creates a binary image (.bin or .hex) uploaded to MCU. We won’t go into details right now as this will be more convenient to do in later code examples. Let us get directly to the code writing part, which is very important for linker and tasks before the main() routine.

Continue reading