The Electronic field is an entertaining and exciting world, which is why more and more people are starting to involve themselves as home hobbyists. No matter what types of electronic projects you’re deciding to do, the important thing is you should have some interest and enjoys yourself during the development.
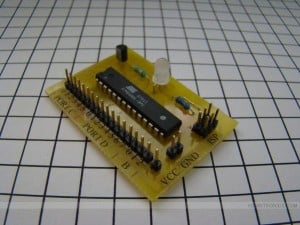
Today is your lucky day for those who have a deep interest in the ATmega board, as you’ll learn to create the ATmega8 development board. This project can be considered as the most accessible development board of all. Thus, there is no need to make it becoming a complicated one!

Once you’ve developed this project, you can simply apply it to test some code or maybe to show off the clock, outside and inside temperature, fuel status, RPM has, or even control some of the functions, such as it will begin to sound if you leave the car’s headlights on!
Since this is a straightforward development project, thus it wouldn’t need any further components or applications to support it. In addition, if you’re already very familiar with the ATmega8, it will only take you a couple of minutes to set it up!
Why commercial development boards differ from a hobby?
Commercial microcontroller development boards often have more electronic components than hobby-made ones because they are designed for more complex and demanding applications. These components can include protection circuits to prevent damage from power surges and other electrical anomalies and capacitors to filter out the noise and ensure stable power delivery to the microcontroller. Additionally, commercial boards often include more advanced features and peripherals, such as Ethernet connectivity, wireless radios, and advanced sensors, which require additional circuitry to operate correctly. All of these extra components add cost to the board, which is why hobby-made boards often have a more straightforward design and fewer components to keep costs low.
When creating a hobby development board, the responsibility for its design and function falls entirely on the creator. Unlike commercial boards that undergo rigorous testing and certification procedures, hobby boards have no such guarantees of quality or reliability. If a hobby board fails to work as intended, the creator is solely responsible for identifying and fixing the issue. This can be a time-consuming and frustrating process, as there may be no support or resources available for troubleshooting. However, the experience gained from creating and debugging a hobby board can be valuable in developing skills and knowledge for future projects.


I bought http://www.awce.com/app4kit.htm which has an ATMega 8 and works well with asm or gcc. You don’t need an external programmer but you can use one if you want. They also have the same blank boards that you can configure for other processors with a little effort.
need information of about atmega8l and also its programmer.
HELLO
If you want to use an ATmega32 here is an easy DIY development board that will help you to develop your skills with this microcontroller: http://www.microdiy.com/index.php?/atmega/diy-atmega32-development-board.html
Have fun developing new stuff!